Getting Started with LiveAdvertise: Setting Up Your First Website and Video Campaign
Welcome to LiveAdvertise. Whether you're here to improve engagement on your website, gain initial traction on a new blog, or grow your YouTube audience with genuine view sessions — this guide will get you set up quickly and confidently.
Here's exactly how to start your first campaigns and make the most of the platform.
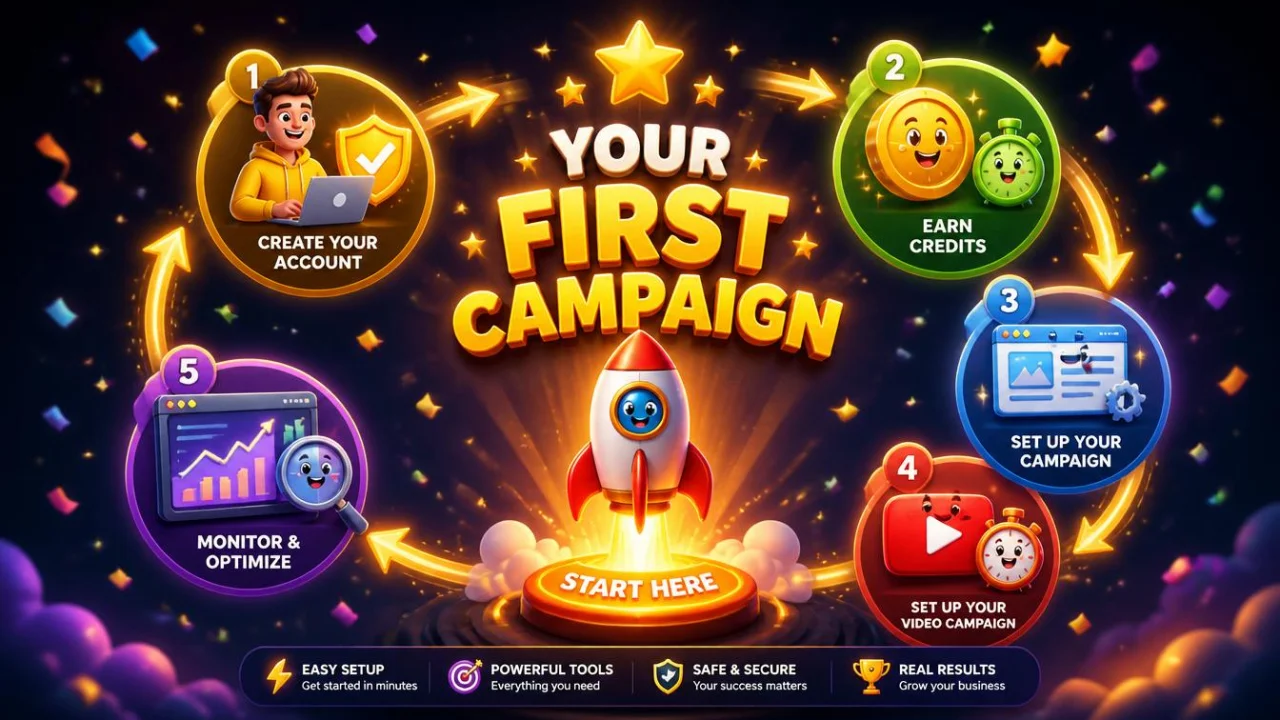
Step 1: Complete Your Account Setup
Before creating any campaigns, spend five minutes completing your account profile.
Add your website URL, a brief description of your content or channel, and set your notification preferences. A complete profile helps the community understand your content and ensures you receive the most relevant visits.
Also check your settings for any geo-targeting defaults. If your content is specifically aimed at an audience in a particular country or region, setting this at the account level saves you configuration time on individual campaigns.
Step 2: Understand the Credit System
LiveAdvertise runs on a mutual-benefit credit system. You earn promotion credits by browsing other community members' websites and watching their videos through the platform viewer. You then spend those credits to have other members visit your content in return.
Earning credits:
- Open the LiveAdvertise viewer from your dashboard
- The viewer automatically loads community members' content
- Stay active for the full session timer to earn your credits
- The longer you browse, the more credits you build
A 30–60 minute browsing session will give you a meaningful credit balance to launch your first campaign. Browsing the community also gives you a valuable perspective on how your content will be experienced by visitors — which helps you optimise it.
Step 3: Set Up Your First Website Campaign
Navigate to the campaign dashboard and click "New Campaign." Enter your website URL — this can be a homepage, blog post, landing page, or any specific page you want to promote.
Key settings to configure:
View Timer How long do you want visitors to spend on your page? For a blog post, 120–180 seconds is a natural starting point. For a detailed guide, 240–300 seconds gives visitors time to genuinely engage with the content. For a landing page, 90–120 seconds is appropriate.
Max Views Per Hour How many visits per hour do you want to receive? Start conservatively — 10–20 per hour creates a natural visit pattern. You can increase this gradually as your campaign develops.
Referrer Attribution Where do you want visits to appear as coming from in your analytics? Options include direct, Google, Facebook, Twitter, and others. Choose the source that best matches your promotion goals or your existing traffic mix.
Device Targeting What device mix do you want? Most content benefits from a 60/40 or 70/30 split between desktop and mobile. Match this to your actual audience — check your existing Google Analytics device breakdown for guidance.
Geographic Targeting If your content is geographically specific — a local service, a country-specific guide, content in a specific language — target the appropriate regions. This ensures you're receiving relevant community visits.
Step 4: Set Up Your First Video Campaign
LiveAdvertise supports both YouTube video and YouTube Shorts promotion. Select "Video Campaign" from the campaign dashboard.
Paste your YouTube video or Shorts URL. The platform will verify the link and pull in your video details.
For Shorts: Set your watch duration to match the full length of your Short. Shorts benefit most from complete views — partial viewing doesn't help your completion rate, which is the primary metric YouTube uses to evaluate Shorts.
For long-form videos: Set your watch duration to a meaningful portion of your video. If your video is 12 minutes, a 6–8 minute watch duration creates genuine watch time without requiring an unrealistic commitment from viewers.
Standard video settings (view timer, device targeting, geo-targeting) all apply to video campaigns and should be configured with the same care as your website campaigns.
Step 5: Monitor and Optimise
Check your campaign dashboard after 5–7 days. The platform shows you views delivered, credits spent, and campaign performance.
Simultaneously, open Google Analytics and look at your site's engagement metrics. You should see improvements in average engagement time and pages per session as genuine community visitors interact with your content.
For video campaigns, check YouTube Studio after 7–10 days. Look at your watch time data and impression metrics for the promoted video.
If your website campaign isn't performing as expected:
- Check if your page loads quickly on mobile (slow pages lose visitors even from community promotion)
- Review your view timer if it's too long, visitors may not complete the session
- Make sure your content delivers on whatever the referrer source would suggest
If your video campaign isn't performing as expected:
- Ensure your video's first 15 seconds are engaging — this is where most viewers decide to stay or leave
- Review your watch duration setting — adjust to match realistic viewing patterns
Tips for Best Long-Term Results
Earn while you spend. Keep the viewer running during your working hours. This ensures a steady credit income that funds your campaigns without interruption.
Promote your best content first. Start with the pages or videos you're most proud of. Strong content makes the most of genuine community visits.
Scale gradually. Begin with modest daily volumes and increase over 2–3 weeks. Gradual growth looks and performs more naturally than sudden volume spikes.
Combine with other strategies. Community promotion works best alongside organic SEO, email marketing, and social promotion. It's a complement to a broader strategy, not a replacement for one.
The community is real. The visits are genuine. Build on that foundation with content that delivers, and the results will compound over time.